Folded Box - Email me for any help or tips
Click on this link and have a look. Charlie Kaiser Plans This is the basis of the plans I've used for two decades. This is for reference only, as there are no dimensions. I now use the mirror image of this layout which results in a double thickness top panel having two major advantages.
Current plans based on the dimensions of the original Coulson boxes and the pattern of Kaiser's folding scheme. Detailed Box Plans
The Coulson sizes are for a very large female Red-tail, a typical sized Harris's or Red-tail, and for micro-hawks like American Kestrel, Merlin, or Sharp-shinned Hawk. Plus I added dimensions I refer to as MAXIMUM SIZE, which is 2' X 2' X 1'. The downside to this large box is bulkiness, a consideration in loading a vehicle. It is 1 3/4" deeper than the large Coulson box, otherwise the same. It is a bit cumbersome to lug to the field if releasing your buzzard a distance from your vehicle. However the dimensions are very simple, which makes it easier to build and provides more tail clearance.
Materials:
UNCUT 4'x8' Coroplast Sheet
Sharpie or other marker
6X 1/4" Automotive Fasteners (you won't use them all probably)
Measuring Tape
Straight Edge or even better is the T shown below
Good Scissors
Package Wrapping Tape
Long Strips of Velcro
1.5" to 2" diameter wooden dowel cut to width of box, and wrapped with daisy mat (this is the perch)
2X 1/4" X 3/4" Long Round Head Wood Screw
2X 1/4" Fender Washers (have small hole, but large diameter)
Hand drill and small drill bits (around 1/16" to 1/4")
1" spade bit for air holes
Before You Start:
White Coroplast is translucent, so if your bird will not tolerate the light, then you may have to paint the OUTSIDE of the box. Whatever color paint you use, it needs to be opaque, and a finish coat of white will keep the box cooler. Some hawks do not mind the light coming in, others do. You can do the painting after.
Not usually recommended, but if you paint the interior, do not put a hawk in it for a couple of weeks because of fumes.
From Coroplast's web site:
Q: Is it possible to paint on Coroplast®?
A: Krylon Fusion® Spray Paint for Plastics will provide a thin durable layer. Follow the manufactures directions for application of the spray paint. Brushes and rollers are not recommended for direct application of paints to Coroplast® because the paint layer is too thick and can easily peel and delaminate. For art projects you may use brushed application of compatible paints on top of the "primer"/ base layer of the Krylon Fusion® Spray Paint for Plastics.
Instructions:
Note: the more square you cut your box the better - to check a rectangule for squareness, measure diagonally across the corners before you cut. If the two diagonals are the same, then it is square.
Cut the Coroplast sheet to the dimensions on the plan. For the mid-sized box this will be 79" X 43". Look at the plans. Mark your large Coroplast sheet with marker, preferably washable, not permanent. Practice cutting first on a scrap piece, especially the half cuts. The solid lines will be cut completely through, the dotted lines carefully with
utility knife just halfway through. These are the fold lines.
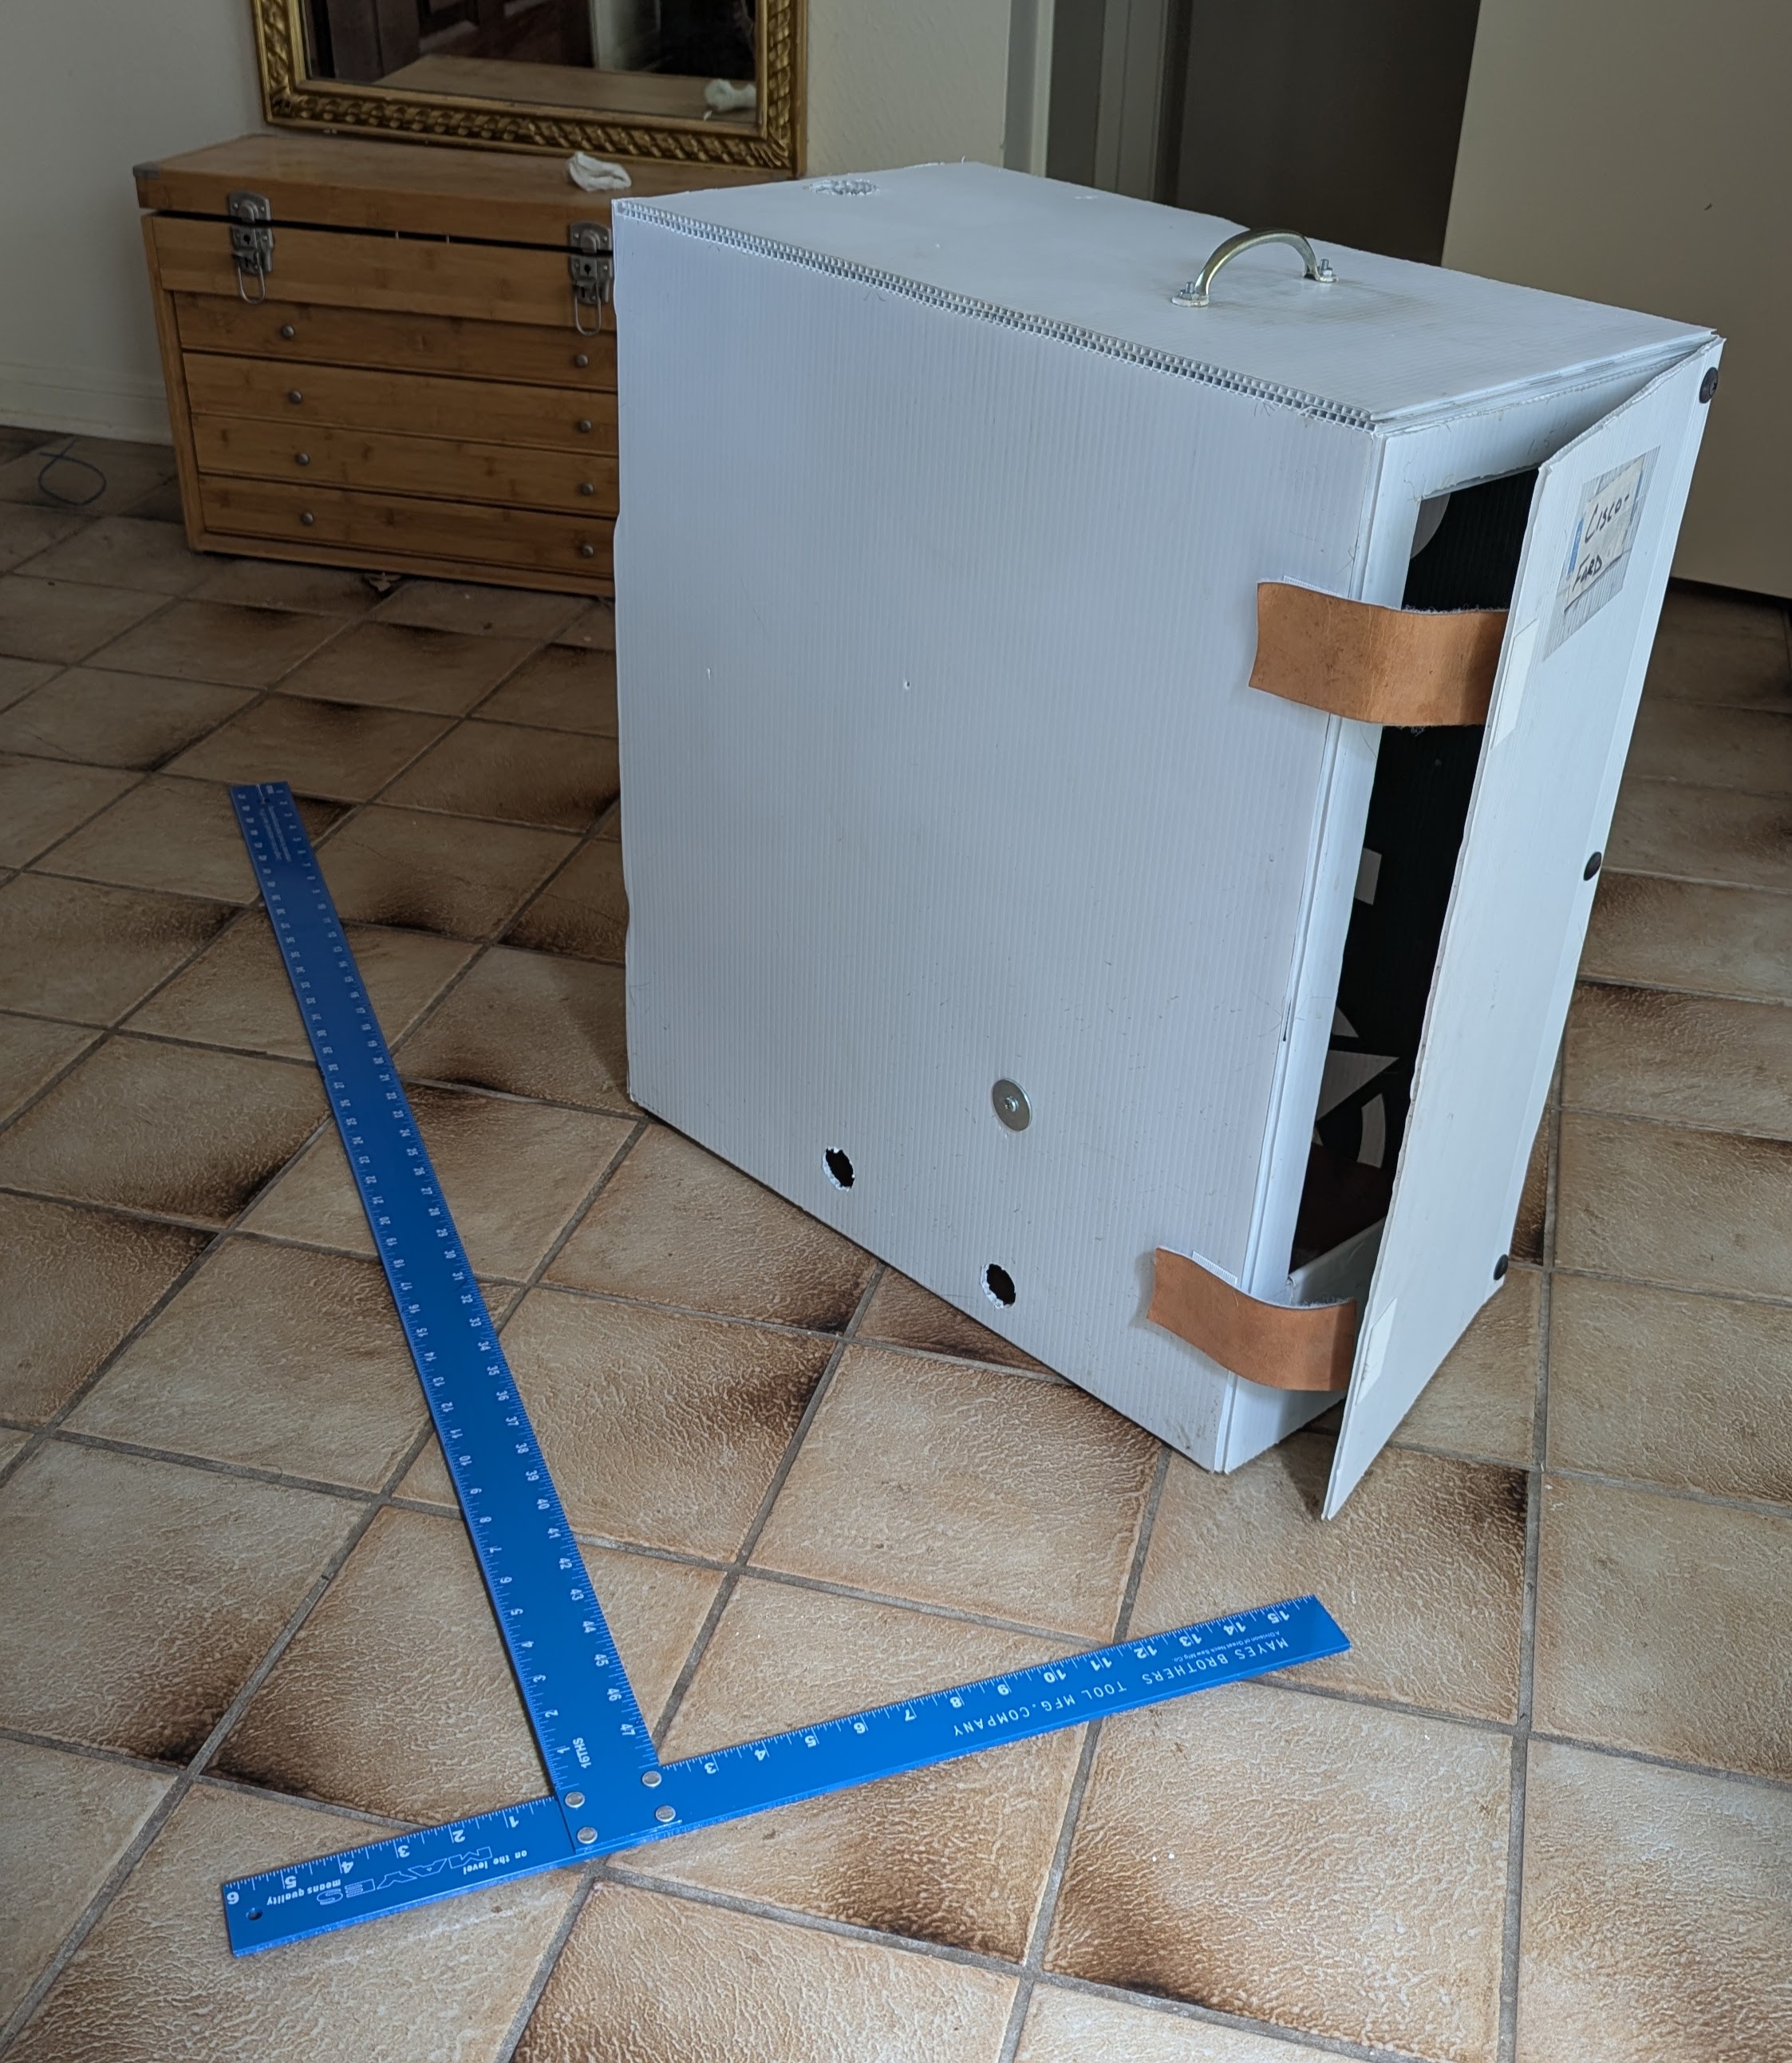
Fold into a box. Use the tape to hold into place. Use the automotive fasteners to hold panels together on the right side of the door. It is possible to build this box with no Barge cement except for the perch ends. It is quite sturdy with the the perch, handle, and three automotive fasteners doing the job. In the back of the box is three layers of coroplast. Make the middle layer out of the two half panels, placing them between the two full panels. This will not make sense until you get to that point. You can use extra material to reinforce the outside corners, if desired. Also, Barge cement can be added at spots if you think it needs it. The more square your panels are cut, the better it will go together.
Use at least two strips of Velcro to keep door closed.
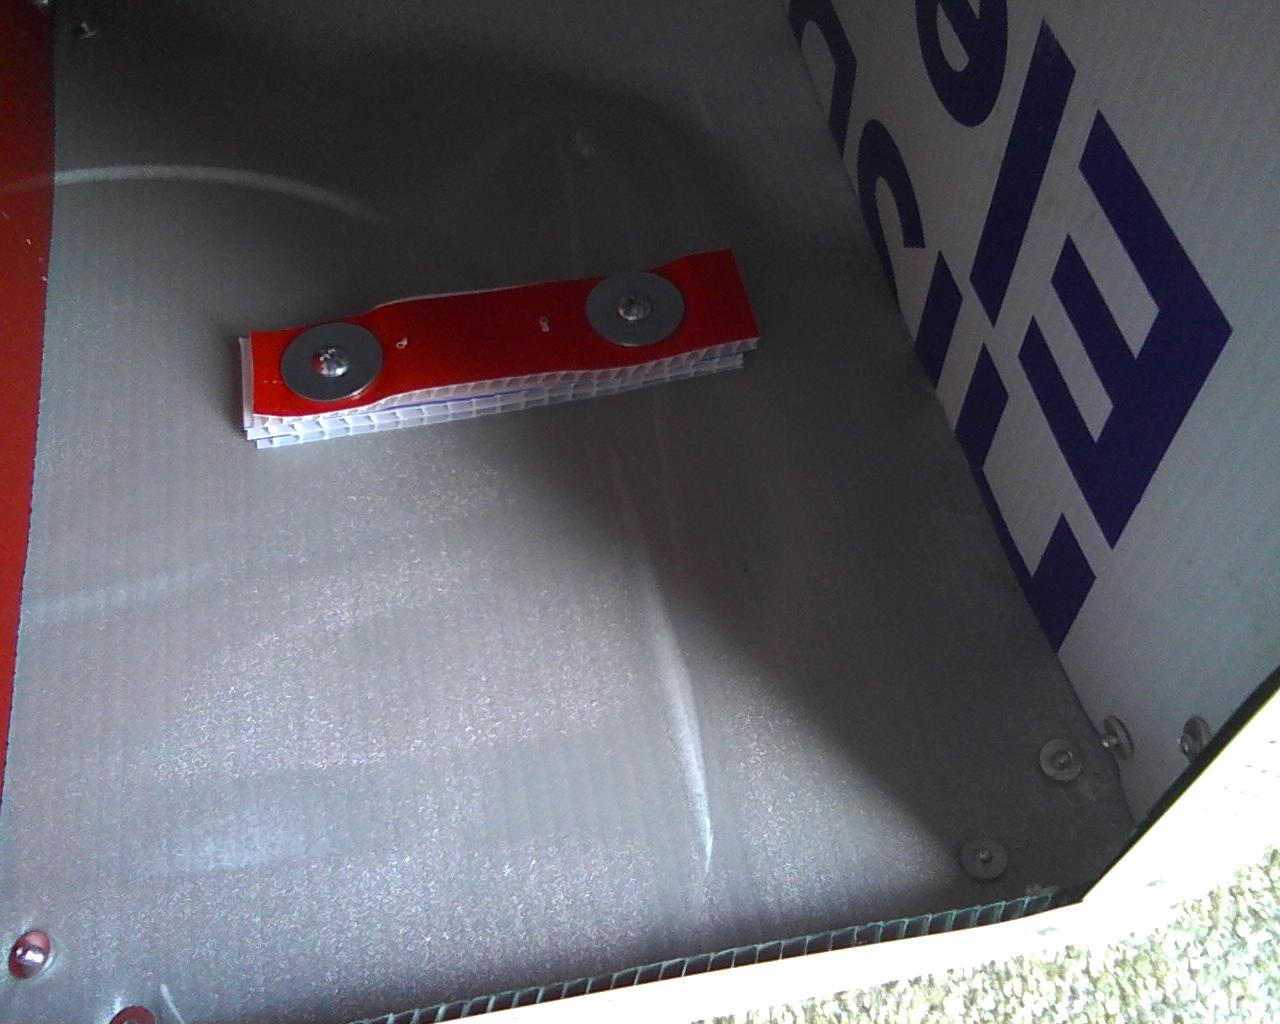
Perch: Read this paragraph carefully so you understand what we are doing with the cement. If you don't have the perch ends cemented, the perch will spin. Cut the dowel pin to the width of the box (12", 11", or 9 1/2"). Drill a 1/16" pilot hole centered in each end of dowel. Drill two 1/8" holes in side panels of the box at the points where you will put the perch. Smear a small amount of Barge cement inside the box at these holes. This cement will prevent the perch from spinning. With a fender washer outside the box under each screw head, screw the perch into place and gently snug it up. Then spin the perch which should smear the cement at each end of perch and the inside wall of box. Back off on your screws so there's an air gap at each end and wait about 10 minutes. Tighten screws until it's fairly snug and the fender washer is depressing the sheet a little.
The perch now should not spin. See picture below which shows a screw head and fender washer.
With a 1" spade drill add vent holes down below as shown in the picture. The single hole on top is 1 3/4" diameter. It is a good spot for a 12V CPU fan run at 4V to 5V from a power supply. Will aid keeping the air fresh, but is not for cooling. Also you might cut a 3" X 1/2" slot on side at eye level so the buzzard can look out. The Coulsons often do the same. Be careful so that you don't encounter something that will panic the hawk inside the box.
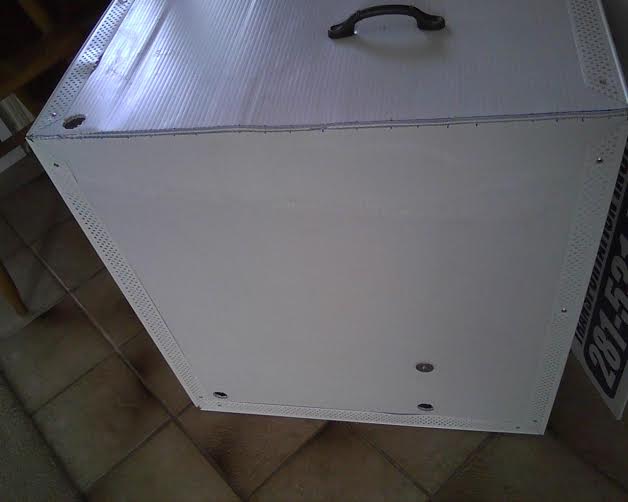
Install a carry handle on top placed with center about an inch or two behind the perch for balance when the buzzard is inside. I use a drawer handle that is comfortable
for my hand with three stacked rectangles of coroplast for a backing plate with fender washers. Or you can use rope handles.
Rectangles and fender washers for backing up handle. The box is turned upside down in picture.
Toby Bradshaw puts a bungee cord all the way around his box to keep the door secured, in addition to his door closers.
Note: This should be common sense, but be very careful about leaving a box in the sun, or anyplace where CO fumes can collect. Also, the CPU fan keeps air fresh and should help remove body heat, but is in no way a real cooling system. Keep the buzzard and box in cool, shaded environment at all times.
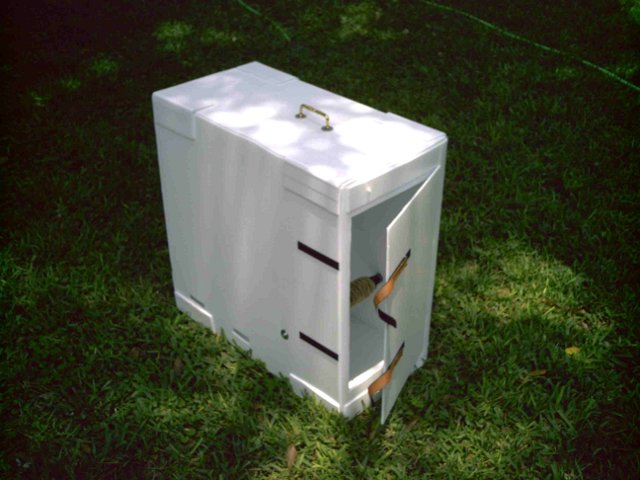
Below: I believe this was my first coroplast box. Front view displaying velcro latches, perch, handle, and at the corners, bumpers made of coroplast. Back view of box showing 12V CPU fan installed for ventilation and removal of body heat. I now drill a 1.75" diameter hole on top near the back and place the fan there instead.
Here is an enhancement for any box that you make. The hawks will slice in the box and mutes will run down into the lower corner running across the box. It gets very difficult to clean. One solution is to cut a rectangle with a short flap at the bottom, that fits into the back wall of the box. Make it snug, but not buckling. When you need to clean it, pull it out. Push back in when cleaning is complete.

| 